


45L full mono kit with tub
Here by popular demand!
You asked, we provided. A 45L Monotub mushroom grow kit jam packed with enough goodies to get you going!
What does this kit NOT contain?
Spores
Heat Mat
So what is included in this 45L Monotub Kit?
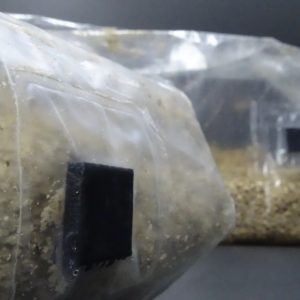
45L MonoTub with 6 thermally cut vent holes.
6x wads of Polyfill for air filtration
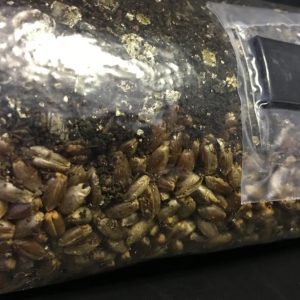
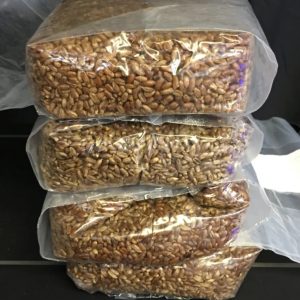
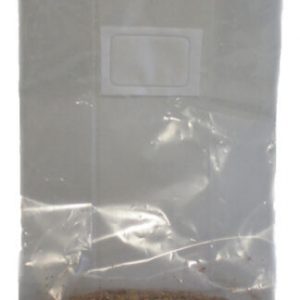
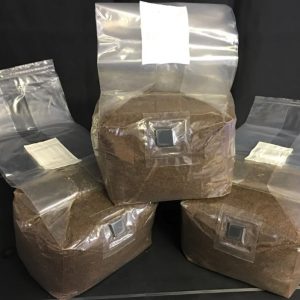
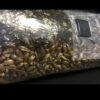
1.5kg bag of Sterilized Rye Grain Spawn Substrate
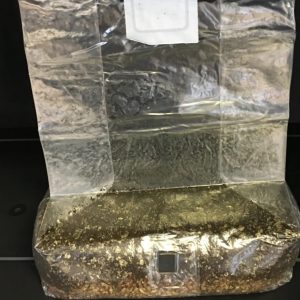
3x1kg bags of Bulk CVG Bulk Mix
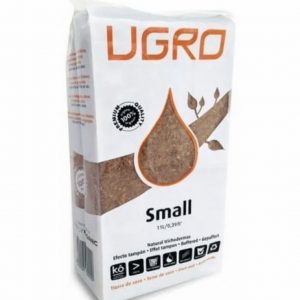
1000ml bag of Vermiculite Casing Layer
Black Liner for the MonoTub
1000ml fine mist Spray Bottle
MycoMedi Glove Pack
The first step.
Firstly you will need to inject your chosen spores into the 1.5kg Rye Grain Spawn Bag. Please do not wipe or heat the needle before injection.
After injection of 10-20ml of spore solution into the Rye Grain Spawn bag. You will need to incubate the Spawn Bag at 26-27c so the spores can germinate.
Mixing the bag to help spread mycelium around is a great idea and will not damage the mycelium. Mix the bag as soon as you see the spores have germinated.
Mycelium grows at the rate of about 1cm per 7days. Mixing the mycelium through out the bag will help the bags colonize in a much shorter time.
The Rye Grain Spawn Bag is considered fully colonized when all the grains are white with mycelium. Please colonize the Rye Grain Bag in a dark warm space 24-27c.
What do I do now the Rye grain bag is fully colonized?
Firstly, congratulate your self on making a Fully Colonized Bag of Rye Grain Spawn.
This spawn will be used to colonize the CVG bulk substrate so please read on.
Setting up the MonoTub.
Choose a clean room or space where the air is still and odorless if possible.
The monotub we will send you already has 6 thermally cut vent holes (Thanks Elves). Into each of these vent holes you will need to stuff 1 pre-cut Wad of white Polyfill. This will slow down and filter the gas and moisture exchange needed for fruiting.
Once all six pre-cut wads of polyfill have been placed, please move onto the next step.
Cutting and placing the included black liner into the monotub.
To cut the liner to the correct size. Please use the following method.
Flip the MonoTub box upside down.
Drape the included Black Liner over the upside down MonoTub.
With a sharp pair of scissors. Cut the black plastic liner so that only 4inches of plastic liner hang down the sides of the MonoTub.
This will actually make two liners. Make sure the substrate is laid onto what was the inner side of the the bag. This is the clean side.
After the liner is cut to length. Turn the MonoTub the right way around. You will now be able to place the liner inside of the MonoTub.
The liner acts like a clean and sterile surface for your substrate to be poured into.
Adding the Colonized Spawn and Bulk Substrate.
With the black liner and polyfill wads in position, you can now add your substrates.
You will be making a layered substrate mixture just like a lasagna.
Without cutting the bags open yet…..
Break up the colonized Rye Grain Spawn but do not open the bag.
Loosen up all 3 Bulk Substrate CVG bags but do not open the bags.
Once all the substrate has been broken up and is loose you can cut the tops off each bag so they are ready to be used.
To start off….
Open the included MycoMedi Glove Pack and don your gloves.
1. Grab 4 handfuls of the darker bulk substrate and spread the darker CVG all over the bottom of the liner that sits in the monotub.
2. Grab 1 handful of broken up white colonized Grain Spawn and spread this over the layer of bulk CVG substrate. Keep the grain spawn spread to the center of the MonoTub. Keeping the spawn away from the edges of the MonoTub will help prevent side pinning and reduce contamination risk.
3. After each layer of Grain Spawn goes a layer of Bulk CVG Mix. Adding 2 handfuls of CVG mix will be perfect for each middle layer.
4. Continue with the layers of 1 Spawn and 2 CVG mix until all the spawn is used up.
5. You want to keep 3-4 handfuls of the Darker Bulk CVG mix to cover all the grain spawn. Hiding the spawn under the Bulk substrate also keeps it hidden away from contamination.
6. After adding the final layer of CVG Bulk mix. Use your fingers to compact the substrate ONLY AROUND THE EDGES OF THE SUBSTRATE. This will help against mushroom side pinning.
7. To finish off…. Add a sprinkle of Golden Vermiculite casing layer to the entire surface of the bulk substrate. Just like Hundreds and Thousands on ice cream it just a sprinkle of vermiculite.
Now what? Close up the monotub and start fruiting straight away.
As soon as you have finished layering the substrates into the MonoTub and have added the vermiculite casing layer.
You should mist the surface of the vermiculite casing layer with the included mister bottle. 5 Squirts of mist on a fine spray setting should be fine.
Add the lid and incubate at 24-27c.
Do i need to mist or fan the mono tub each day???
This is almost an impossible question to answer…… But I will try my best.
As the mono tub is designed to leak moisture via the 6 polyfil stuffed ports, the moisture leakage rate will depend on a few factors.
The biggest of these factors are the internal box temperatures as this decides the amount of moisture the substrate will generate and the temperature and humidity of the external air in contact with the polyfil ports as this controls the moisture removal.
The warmer and drier the air around the outside of the monotub, the more moisture will be wicked out of the box. So as a rough guide.
In a damp cold house 15-18@80RH, You will need to fan the box for 30seconds both morning and night.
In a normal house 18-22C@70%RH. Apart from the initial 5 spray of mist on day 1, the box will not need misting at all. Please fan if the surface micro moisture droplets form tiny puddles.
In a normal insulated cupboard 22-25C@55-60RH, you may need to mist if condensation is not forming on the box sides.
In a grow tent like our Magic Mushroom Shimmer Grow Tent 27.5C@45%RH, the box will need 2-3 sprays of mist both Morning and Night time.
The aim is to maintain a constantly evaporating Substrate Micro Moisture. We mist if we are loosing the moisture droplets and fan if the moisture droplets get to big and join up.
Fruiting in a MonoTub should take about 10-14days.
What to do IF…….
What do I do if I dont see condensation on the inside of the MonoTub?
If there is no moisture on the inside walls of the MonoTub you will need to add sprays of mist to replenish the moisture. Also you will need an extra spray of mist to your day and night schedule if your two mist sprays are not enough.
What do I do if I can see that the mist spray is forming pools of water on the substrate surface??
You have been spraying to much mist into the box. To fix this, please reduce the misting by one spray and increase fanning to as much as possible until the pools have evaporated.
What do I do if no mushrooms have formed after 20 days into fruiting???
If the box is at least 24c day and night AND If you have condensation on the Monotub walls but no action after 20 days. Your substrate is most probably to wet and a soggy substrate just wont fruit. To rectify this, Please leave the lid on the Monotub and just walk away. Walking away from the project will allow the moisture to vent naturally from the Monotub. Fruiting will happen within the next 2 weeks.
If you dont have any condensation on the walls of the 45L Monotub box and no action after 20days. Your substrate is most probably to dry. To rectify this… Please add 500ml of clean water to the corner of the substrate and leave overnight. After 12hrs of soaking. Please drain the water away and start fruiting by Fanning the box 3 times a day and only misting 2 times a day.
To check if the substrate is really wet or really dry you can weigh the fresh unflushed mono tub. You started off with 4.5kg of substrate. A lighter than box will be dry and a heavier than box will be wet.
With the right care, this 45L mushroom monotub grow kit can produce more than 1kg of mushroom fruits on the first flush.
With over care (too much of everything) This magic mushroom grow kit will not preform very well for you.
| Add a discounted heat mat? | No thankyou. |
|---|
Related products
-
Grow Kits
4lb 50/50 Injectable Horse Manure And Rye Grain Mushroom Growing Kit
Original price was: £39.99.£35.99Current price is: £35.99. Including VAT: £43.19 -
Spawn & Substrate
10L Coir Brick
Original price was: £4.99.£3.99Current price is: £3.99. Including VAT: £4.79 -
-
-
-

Reviews
There are no reviews yet.